[Ghost] 설치 (portainer)
공식사이트 및 간단한 소개
여기선 필수 내용만 다른다 자세한 내용은 ghost tag 안에 다른 글 참고하세요.
설치 방법
설정 방법
- ㅇㅇ
- 아아아
문제 해결
참고 자료
설치 방법
적당한 설명...
공식 사이트 compose yml 파일
version: '3.1'

services:

  ghost:
    image: ghost:5-alpine
    restart: always
    ports:
      - 9901:2368
    environment:
      # see https://ghost.org/docs/config/#configuration-options
      database__client: mysql
      database__connection__host: db
      database__connection__user: root
      database__connection__password: addnewpasswd
      database__connection__database: ghost
      # this url value is just an example, and is likely wrong for your environment!
      url: http://mnktech.iptime.org:9901
      # contrary to the default mentioned in the linked documentation, this image defaults to NODE_ENV=production (so development mode needs to be explicitly specified if desired)
      #NODE_ENV: development

  db:
    image: mysql:8.0
    restart: always
    environment:
      MYSQL_ROOT_PASSWORD: addnewpasswd
저장소 추가 버전
version: '3.1'

services:

  ghost:
    image: ghost:latest
    restart: always
    ports:
      - 7001:2368
    environment:
      # see https://ghost.org/docs/config/#configuration-options
      database__client: mysql
      database__connection__host: db
      database__connection__user: ghost
      database__connection__password: (
      database__connection__database: ghost
      # this url value is just an example, and is likely wrong for your environment!
      url: http://mnktech.iptime.org:7001
      # contrary to the default mentioned in the linked documentation, this image defaults to NODE_ENV=production (so development mode needs to be explicitly specified if desired)
      #NODE_ENV: development
    volumes:
      - ./data:/var/lib/ghost/content

  db:
    image: mysql:oracle
    restart: always
    environment:
      MYSQL_ROOT_PASSWORD: (
      MYSQL_USER: ghost
      MYSQL_PASSWORD: (
      MYSQL_DATABASE: ghost
    volumes:
      - ./data:/var/lib/mysql
arm용 설치
ARM7 아키텍처에서는 전용 mysql 과 node 14 이하 버전을 사용해야 된다.
version: '3.1'

services:

  ghost:
    image: ghost:4-alpine
    restart: always
    ports:
      - 7002:2368
    environment:
      # see https://ghost.org/docs/config/#configuration-options
      database__client: mysql
      database__connection__host: db
      database__connection__user: ghost
      database__connection__password: (
      database__connection__database: ghost
      # this url value is just an example, and is likely wrong for your environment!
      url: http://mnktech.iptime.org:7002
      # contrary to the default mentioned in the linked documentation, this image defaults to NODE_ENV=production (so development mode needs to be explicitly specified if desired)
      #NODE_ENV: development
    volumes:
      - ./data:/var/lib/ghost/content

  db:
    image: beercan1989/arm-mysql:latest
    restart: always
    command: [--ignore-db-dir=lost+found]
    environment:
      MYSQL_ROOT_PASSWORD: (
      MYSQL_USER: ghost
      MYSQL_PASSWORD: (
      MYSQL_DATABASE: ghost
    volumes:
      - mysql_data:/var/lib/mysql
      #mysql_data  ./data

volumes:
  mysql_data: {}
볼륨의 경우 command 명령어를 수행하지않으면 ext4 폴더가 비어 있지 않다고 디비 설치중 에러가 발생한다. ?? 정확히 무슨 말인지 까먹었다 다시 확인 필요
설정 방법
아ㅣㄴ머림ㄴㅇ
STMP 메일 설정
Prerequisite
Portainer - Connect Ghost container console
SSH - Connect to Ghost server
Step 1: Access the config.production.json file
When setting up SMTP email sending for Ghost, you only need to make an edit to the config.production.json file.
ghost 폴더에 있는 config.production.json 파일을 수정해야 합니다.
nano -w /apps/ghost/config.production.json

sudo vi /apps/ghost/config.production.json
Step 2: Add SMTP settings
먼저 구글 앱비밀번호 를 생성 합니다.
- Go to https://myaccount.google.com/apppasswords
- Enter your regular password from your Google account (this is security settings)
- Select app, choose Other, and put the name (i.e SMTP)
- Now copy your password and write it down (you will have no chance to see it for the second time here)
config.production.json 파일의 "mian" 부분을 Gmail 앱비번을 정보를 이용해서 아래와 같이 변경해 줍니다.
"mail": {
    "transport": "SMTP",
    "options": {
      "service": "Google",
      "host": "smtp.gmail.com",
      "port": 587,
      "auth": {
        "user": "[email protected]",
        "pass": "this password"
      }
    }
  },
- vi 가 설치 안되어 있다면 설치한다.
sudo apt-get updatee
sudo apt-get upgrade
sudo apt-get install vim
Step 3: Restart
In order for your settings changes to take effect, you'll want to restart. Your Ghost site is being managed by Supervisord, so you want to restart Supervisord with this command, and it will restart Ghost for you.
ghostusername으로 권한 변경 후 Ghost 서비스를 재시작 해줍니다.
su ghostusername
ghost restart
#동작하는지 확인해봐야됨
#touch /system/supervisord/restart.ini
The content folder is not owned by the current user
혹시 위와 같은 에러가 떴을 땐 root 계정으로 컨텐트 폴더를 현재 유저의 소유권으로 바꿔주면 됩니다.
su root
chown -R ghostusername:ghostusername /var/www/ghost
su ghostusername
ghost restart
Step 3: Test
관리자모드에서 lab에 들어가면 제일 밑에 mail 테스트를 할 수 있습니다.
!!!!!!!!!!!!! 최대한 심플하게 정리하자
보안설정 -
The first thing to do is to tweak a few settings in your CloudFlare account, specifically the Crypto tab. To enable SSL protection in CloudFlare, simply select Flexible from the drop-down menu.
This process can take up to 24 hours to complete fully, as CloudFlare needs create and sign an active certificate, so make sure you see the "Active Certificate" setting before proceeding to the next steps below.
There are other settings you can select - Full and Full (strict), but for the purpose of this guide Flexible will be perfectly fine. To take advantage of Full and Full (strict), you need to have a third-party SSL certificate installed on your server.
Once SSL has been enabled within CloudFlare, you need to make a few changes to your Ghost setup to make sure that this works correctly. We need to update our config.js file:
boo@ghostpi ~ $ nano /var/www/ghost/config.js
Then simply change the following:
production: {
    url: 'http://my-ghost-blog.com',
To:
production: {
    url: 'https://my-ghost-blog.com',
Notice the https part!
Exit CTRL+X and save Y then to make the changes live, we need to restart Ghost:
boo@ghostpi ~ $ sudo supervisorctl restart ghost
근데 이걸 NPM에서 해줘야 하는거 아닌가? 우리는???
The last part is to ensure you log in to your Ghost blog and then make sure you update the home link in the Navigation section, as this will still be the http version.
The last part to securing our Raspberry Pi hosted Ghost blog is to add a few security headers to our NGINX configuration file. The particular headers we'll add are:
You can read all about these headers by following the links above, but to enable them on your NGINX server, you need to edit your ghost.conf file that we created previously:
boo@ghostpi ~ $ sudo nano /etc/nginx/sites-available/ghost.conf
Then just add the following to the top:
add_header X-XSS-Protection "1; mode=block";
add_header X-Frame-Options "SAMEORIGIN";
add_header X-Content-Type-Options nosniff;
So your ghost.conf file should look like this, obviously with {DOMAIN} will be your custom domain name:
add_header X-XSS-Protection "1; mode=block";
add_header X-Frame-Options "SAMEORIGIN";
add_header X-Content-Type-Options nosniff;

server {

    listen 80;
    server_name {DOMAIN};

    location / {
        proxy_set_header   X-Real-IP $remote_addr;
        proxy_set_header   Host      $http_host;
        proxy_pass         http://127.0.0.1:2368;
    }

}
The last thing to do is to exit CTRL+X and save Y and then restart the NGINX server with:
boo@ghostpi ~ $ sudo service nginx restart
To test your site and the security you have just added, you can use a variety of different online tools. I found that the free SSL Server Test by Qualys SSL Labs does a great job, and will grade your site from A+ to F. It may be worth doing this before and after you have made the changes above to see how your compare.
Here are the results of my site just for proof (minus the IP addresses):
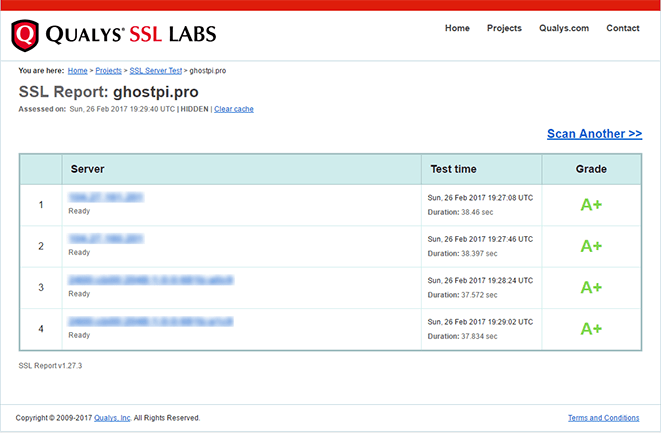
If you found this guide, as well as any other guides on Ghost Pi helpful, then if you wanted to buy Ghost Pi a coffee to show your support, then that would be greatly appreciated! As this site does not use any form of adverts, all the costs for running and maintaining the blog are done voluntarily so any extra would be fantastic!
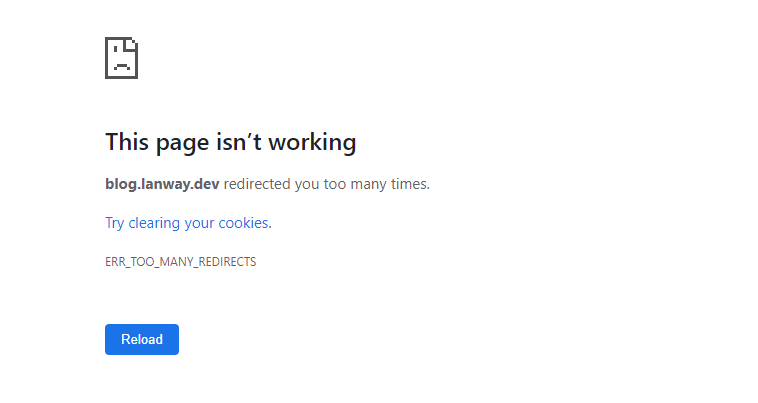
문제 해결
cloudflare와 npm 리버스 프록시 이용해서 ssl 적용시 로그인과 회원가입이 안되는 문제가 발생한다. 이때 해결 방법
여기로 통합해봅시다
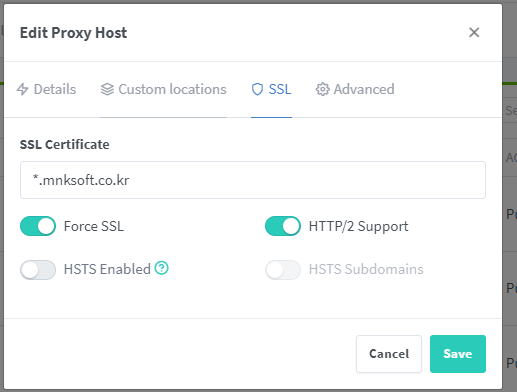
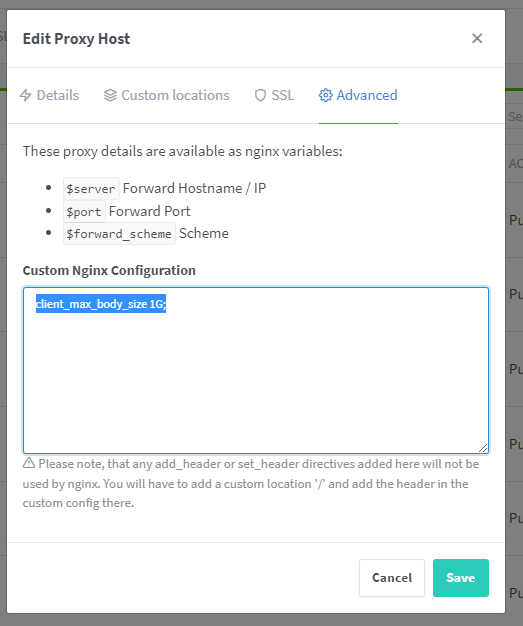
엔진엑스에서
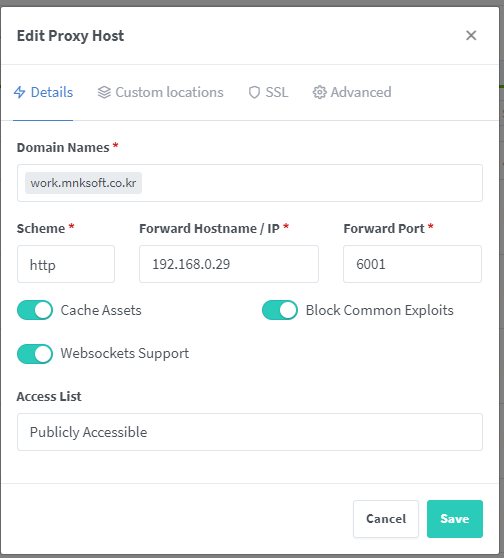
내부연결은 http로 그대로 둔다.
ssl 탭에서만 범용 인증서 받은걸로 설정한다.
대용량 파일 지원가능하게 설정해준다.
도커 컴포즈 설정에서 url를 https로 변경
url: https://work.mnksoft.co.kr클플에서
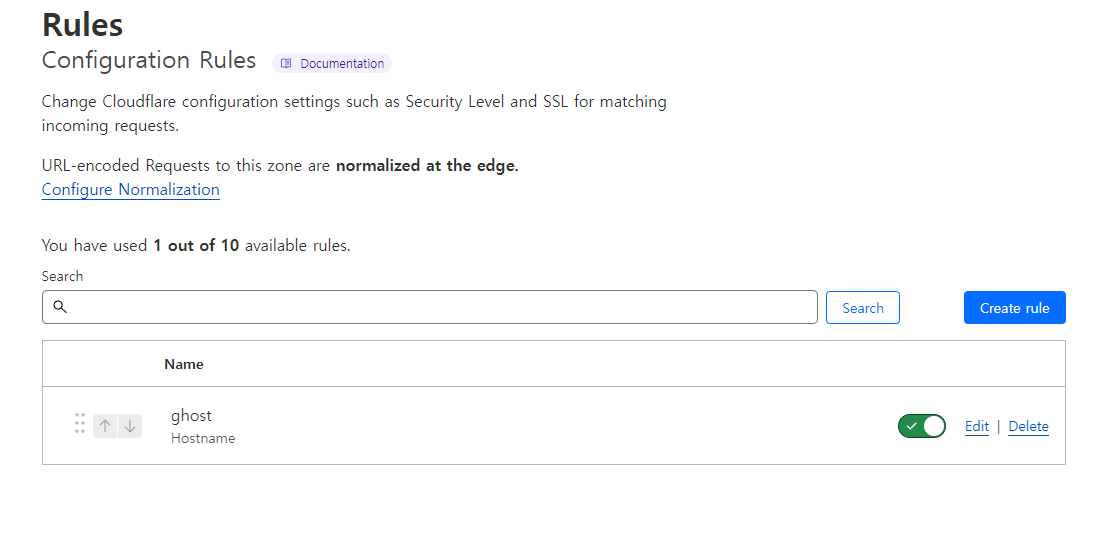
https://dash.cloudflare.com/9cad911009e8bf0b675ba28620fb2e2c/mnksoft.co.kr/rules/configuration-rules
여기서 해당 도메인만 full로 인증서 사용하게 변경
그리고나서 인스턴스에 콘솔 접속해서 config.production 여기서 url 을 https로 변경해주면 자체 인증서를 이용해서 처리됨
!!!!!
이렇게 말고 클플꺼를 그대로 사용하는 방법은 아직 모르겟음
찾아봐야될듯
참고 자료
이방법으로 설치하는것 고려해봐야 될거 같은데


참고자료들

 Andrej Friesen
확실하지 않음
 tolitius
arm7 용 mysql 5.X 버전 도커
beercan1989진행중 네트워크 DB를 사용해서 설치하게 구성하는 방법
db 설정에서 네느워크로 주소 써주면 될듯

이건 렛츠 인크립트 사용하는 버전

이건 안하는 버전이라는데 확인해봐야됨 - 이건 좀 다른거 같은데....흠...
 visioun.
이건 클플에서 모드를 대충 풀로 하란 소리 같음
엔진엑스용 클플 토큰
UA0i9_A_V1-8tths2fiDjv7tPhMalo4wD0hiQcCD
고스트 설정값 옵션

참고자료


https://ghostpi.pro/secure-your-ghost-blog/
리버스 프록시 쓰면서 렛츠 이크립트 사용법

 Geek’s Admin
 Geek’s Admin
 Louis Barclay
More Ghost tutorials in this Category
How to edit the title and description of your Ghost blog
How to change the timezone and publication language of your Ghost blog
How to change the Favion, Site Logo and Cover Image in your Ghost blog
How to customize the metadata information of your Ghost blog
How to Password Protect your Ghost blog
How to configure and test SMTP email functionality in your Ghost blog
How to enable Membership Subscriptions in your Ghost blog
How to display Social Media icons on your Ghost blog